Catalogue Management
ALO Catalogue lets you organize photos, add descriptions, compose printing formats and get printable catalogues. You can manage the catalogue from the menu by selecting Catalogue.
When selecting Models  a mask to insert and modify models will appear.
Through this form, you will be able to organize your images, as well as manage their credentials, such as the model, weight, dimensions, prices, etc. (See the figure) :
a mask to insert and modify models will appear.
Through this form, you will be able to organize your images, as well as manage their credentials, such as the model, weight, dimensions, prices, etc. (See the figure) :

Data management can be managed through the navigator on the lower left.

By it's buttons you can:
-
 : Slide between the item in the catalogue.
 -
 : Add/delete/modify/save/cancel
(x active only if you have changes to save) the item in the catalogue.
: Add/delete/modify/save/cancel
(x active only if you have changes to save) the item in the catalogue. -
 : Update all the fields.
 -
 : Create/search a bookmark.
 -
 : Apply a filter to the catalogue.
Note: If you have changed the catalogue, when you close the previous form, the system will ask if you are going to continue modifying the catalogue. e
For every article, you can specify and personalize the following:
- Item descriptions in different languages. Necessary to print items in catalogue
- Bar code
- Type of metal: clicking on
 makes it possible to insert the type of metal taking it from a list.
(also the list is changeable);
makes it possible to insert the type of metal taking it from a list.
(also the list is changeable); - Weight
- Two Prices
- Carats
- Details
- Dimensions
Others fields:
- Notes and Tags
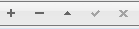
- Family - Group - SubGroup: Will provide you with a more efficient way to organize data.
Clicking on the Magic Wand
 will open the form to manage the three lists :
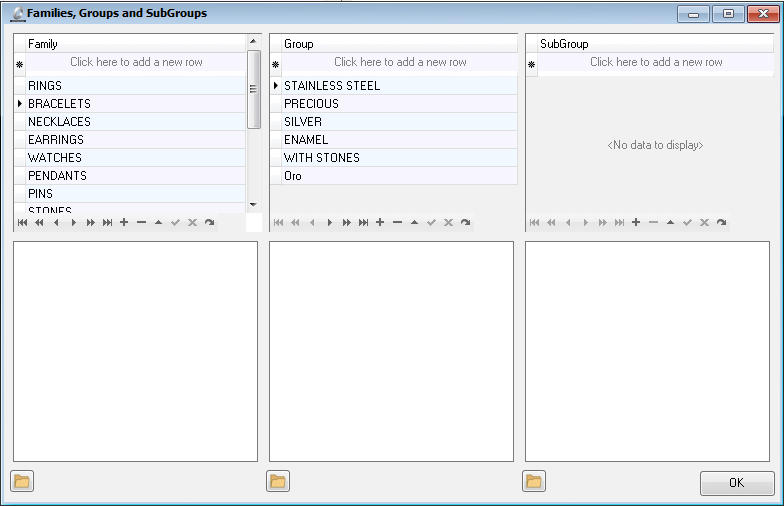
Note: You can manage previous data by using the navigator below, which works the same way as the other navigators previously seen.
You can specify details different from the predefined ones, by specifying them in the program configuration. (see part 4 – catalogue configuration)
To create a new article follow one of these procedures:
First Procedure :
- Open the previously saved article’s image.
- Click on
 and go to Save as New Model.
 ;
; - Insert all data: model, bar code, description, etc.
- Insert family, group, subgroup.
- Insert mask selecting it from the drop-down menu below on the right.
- Push
 . The article will now be inserted in the catalogue.
Second Procedure:
- Open catalogue and select Models .
- Push
 in the navigator.
 - Insert data: model, bar code, description, etc…
- Insert family, group and subgroup.
- Insert mask selecting it from the drop-down menu below on the right.
- Select and insert the image of the desired item. Select:
 If you want to load a previously saved image
 If you want to see the image in real time from the camera
 If you want to erase the image associated with the article
- If you want to modify an image associated to an article, hover over it, right click, then select Copy. This way, the image can be taken from the notes of Windows©, as we saw in 3 - Post processing tools;
- Push , now the article will be inserted in the catalogue.
To look for a previously created article, go through the table by the navigator’s buttons or push
 , will be opened the list of models:

From the Models window:
By selecting Data Export  You can export all of the catalogues into the file models-export.csv.
The file will be opened with the associated default program and then you will be able to save it as a backup.
You can export all of the catalogues into the file models-export.csv.
The file will be opened with the associated default program and then you will be able to save it as a backup.
By selecting Import Data  you can load the saved data from the catalogue in a
.csv file(“Comma Separated Value”), by the function Export Data or from a file with the same data structure.
This function is useful for importing the catalogue from one computer to another.
you can load the saved data from the catalogue in a
.csv file(“Comma Separated Value”), by the function Export Data or from a file with the same data structure.
This function is useful for importing the catalogue from one computer to another.
By using the Page Settings wizard, you can choose the disposition of your models in the printed catalogue page and the way the data will be associated with the images.
You can go to this functionality by selecting Catalogue.
and then on Page Setting Wizard 
The procedure is made up of 4 steps. You can always modify the inserted parameters by pushing Back.
You can always exit from the procedure by pushing
Exit  .
.
Step 1 :
In the first step choose to edit an existing page or create a new one. There are some pre-coded pages that cover most cases.
To create a new page, first of all, select the type:
- Columnar catalogue (same shape on each page)
- Columnar catalogue with Metal – Title summary
- Autosizeable (every shape is positioned automatically)
- Fixed Size (all images are stretched to one mask size)
To eliminate a format, you have to select it from the list below, push the right key and then cancel it.
Made the choices and push Next  .
.

Step 2 :
In this step you have to specify the paper dimensions/orientation, the mask, the text font and which fields to print. For each of them, set the font style (bold, italic, underlined and strikeout) :
 to add all the fields to the print
  to add the highlighted field to those to print
  to eliminate the highlighted field from those to print
  to eliminate all the fields to the print
  to move the model upward
  to move the model downward
Note 1: You can add or eliminate a field clicking on it twice too.
Note 2: To perform a multiple selections of more than one field, keep Ctrl pushed down while clicking on all the desired fields.
On the right select the data position (over, under, left, and right) with respect to the picture. You can also specify the dimensions of the section with data (if you do not push Autosize there could be some cuts). You can also specify if data must be disposed on one sole row and if images must be enclosed by a black board.
If you choose Autosize, the images can be ordered according to the dimensions of the masks, by selecting the corresponding checkbox.
If you choose catalogue Columnar with summary you can insert the details to visualize in the box Metal – Title summary.
Some parameters could be deactivated according to the kind of catalogue chosen in the previous page, as for example Autosize.
Made the choices, push Next.
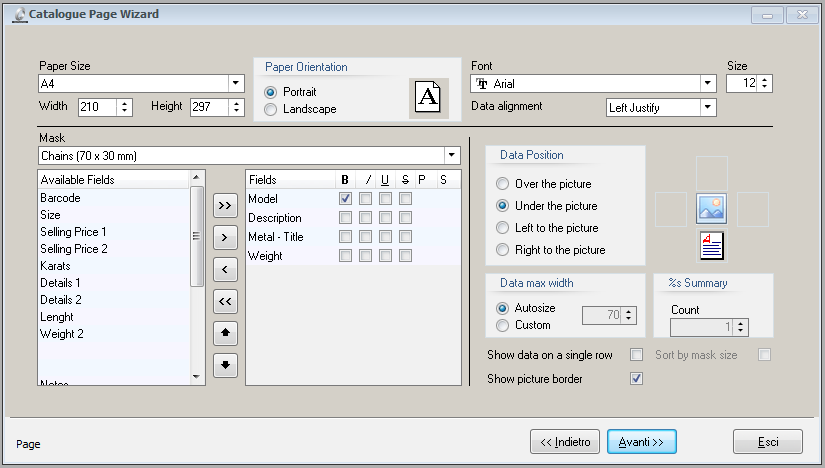
Step 3 :
In these steps the wizard shows a generic preview of the page layout. Here you can adjust the columns and rows offset and the top, bottom, left and right margin. These values increase or decrease the printable area and the distance between each picture.
Then click on Preview  to have a format preview and to modify the image in details:
- Replacement of single fields
- Print of the model
- Current model saving or preexisting models loading
- To export in other formats (HTML, RTF, BMP, etc)
- To save the model in PDF
- To send the model by e-mail
- Zoom in on the model
- To edit the model in detail(see ahead)
- To see the model schema
- To see the miniatures of all the pages in preview and to pass from one page to the other
- To set the page layout
- To go through the model’s pages
To exit from this window push on Close  .
.
By clicking on Advanced  the wizard gives
you access to the editor which will let you make some more customizations (see the following picture). Go to
fast-report.com to see more information about the possible cusomizations.
the wizard gives
you access to the editor which will let you make some more customizations (see the following picture). Go to
fast-report.com to see more information about the possible cusomizations.

Finally push on Next to go to the last page of Page Setting Wizard.
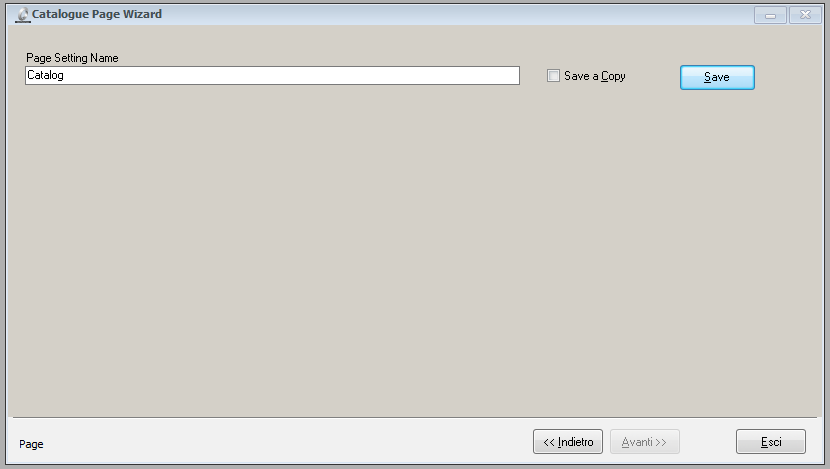
Step 4 :
In the field create a name for the page you just created and click on Save
 .
.
Then click on Exit to close the window.
Selecting Save a Copy, the format will be saved as a copy of the original one. 
Now you will be able to use the new saved format in the next print of the catalogue (see part 3 - catalogue print)
To print the models go to Catalogue and select Print Wizard  .
.
Choose the format to use. Indicate the filters for codex (printing the models comprehended between a starting model and an ending one) and for the model’s detail. If left empty, the program will select all the models available for that format. You can also set the family, the group or the subgroup
Alo’ Photo Scan 5.0 can order the data according to model, family, group or subgroup. Just select the desired order from the list of buttons.
You can also select the language used in the descriptions, so you can print easily catalogues in different languages.

Select Search, after the filters selection  ,
the models will be visualized according the parameters inserted.
,
the models will be visualized according the parameters inserted.
On the left there is the list of the models available for the print, and on the right are where the models to print must be moved (below the image of the model selected in both lists). You can copy an image of a model by going over it and pushing the right key of the mouse. A list of the available buttons:
- Move all the models to the left (they will not be printed)
- Move all models to the right , that is print all them
- Move the selected model to the left (it will not be printed)
- Move current model to the right, that is print the selected model
- Move the model downward
- Move the model upward
Note 1: You can add or eliminate a field by clicking twice over it.
Note 2: To perform a multiple selection of more fields keep Ctrl pushed doown while selecting the chosen fields (they will be highlighted).
Other functions:
 Cancel the current selection
  Load a previously saved selection
  Save the current selection to reload it later
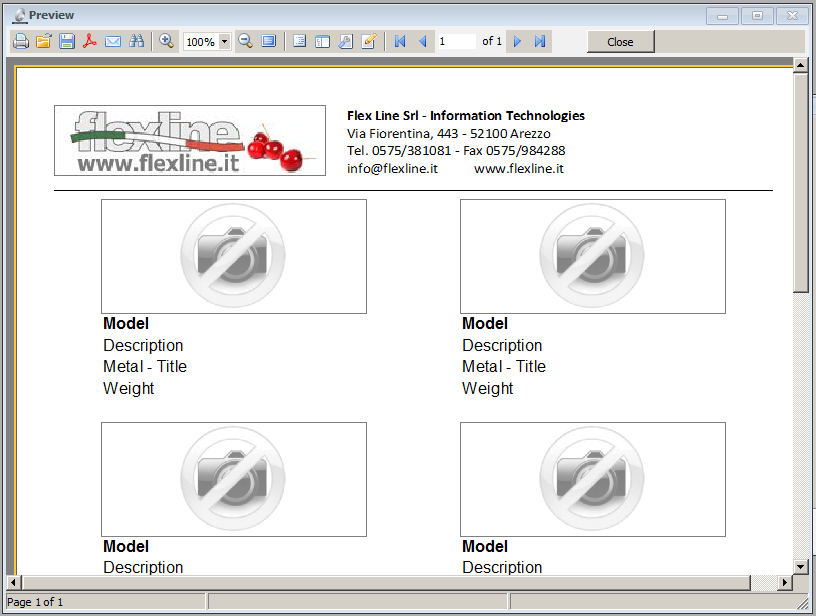
  Print the catalogue as a preview (see image below)

 Makes the catalogue in PDF format, with the models in the current selection
Push on Print  from the window preview.
Here is a list of the parameters modifiable by the user, going to Catalogue, then Setup

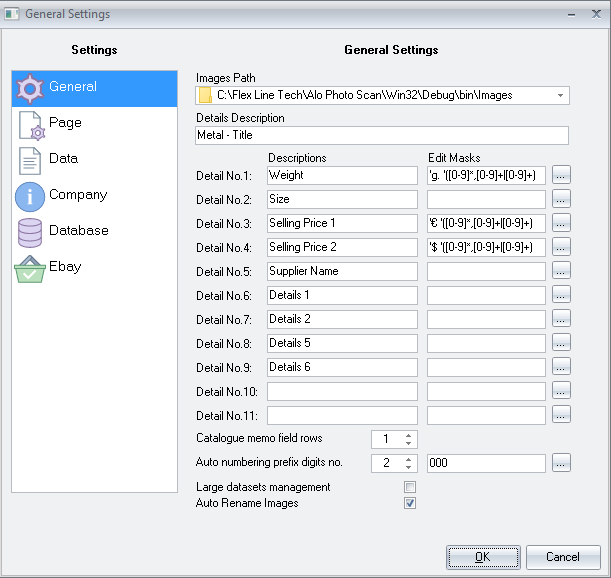 |
General :
|
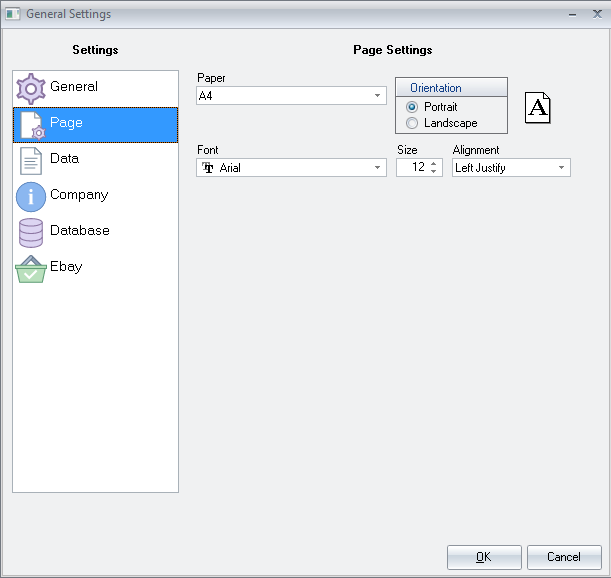 |
Page :
|
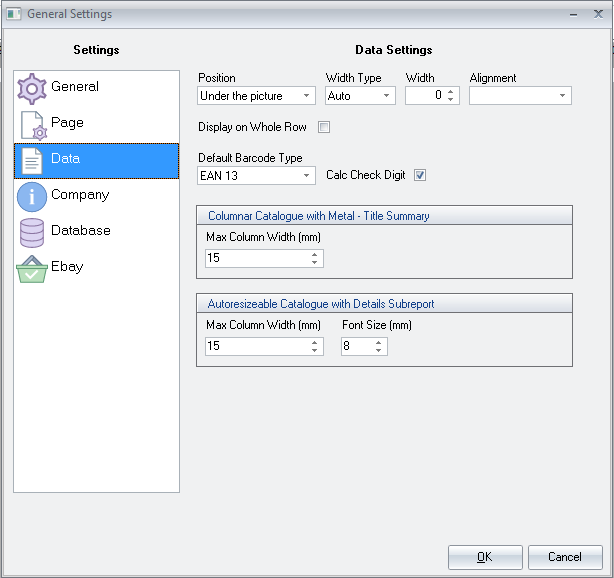 |
Data :
|
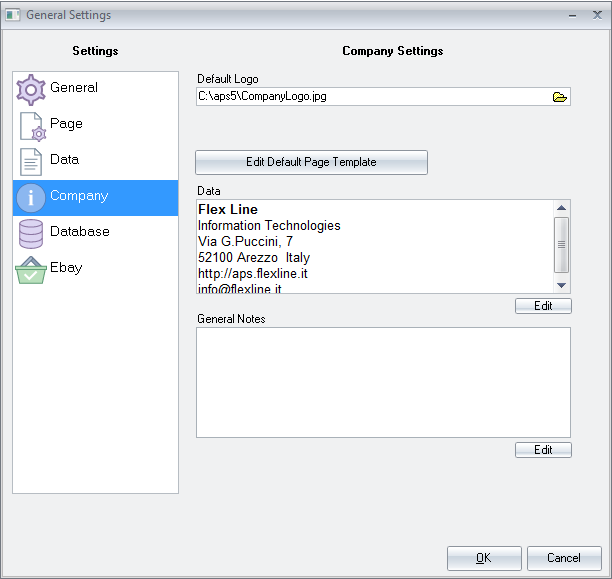 |
Company :
|
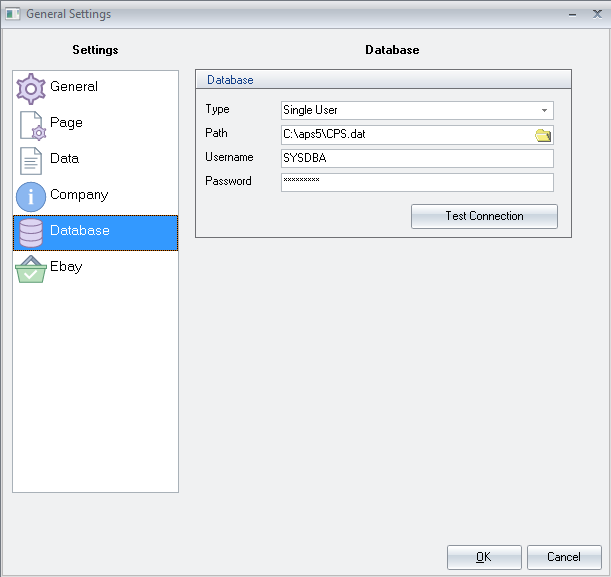 |
Database :
|
Alo’ Photo Scan 5.0 supports import/exportation of data to from other programs. For more information go to this: Alo Photo Scan - Data Import / Export from / to other software .
How to import catalogues data from an older Alo Photo Scan version to a new one :
- From Alo Photo Scan old version, go in Catalogues | Model
- Click button Data Export; the software will export the artcles list in a CSV file, inside the folder IO
- Copy the file and paste in the new Alo Photo Scan IO folder, path : C:\Users\Public\Documents\ALO Solutions\Alo Photo Scan (if the folder is not preset, create it)
- Rename the CSV file in "models-import"
- Open Alo Photo Scan new version, go in Catalogues | Model
- Click button Data Import and click Read File then Import Data
- Click in Catalogues | Setup, in General set the Image Path where are based all the articles images. In Company set again logo and comapny data to print in your catalogues
This guide is intended for advanced users
PC SERVER :
- Install Firebird Win 32 bit version 2.5 and choose server pack during the installation
- Share folder Images (the folder will be in the path chosen during installation)
- Open Alo Photo Scan - Catalogue | Settings :
Database :
- Type : Multi User
- Path: enter the name of the pc or IP address before database path
E.g. "Server-pc:C:\Users\Public\Documents\ALO Solutions\Alo Photo Scan\CPS.DAT" or "192.167.1.1:C:\Users\Public\Documents\ALO Solutions\Alo Photo Scan\CPS.DAT"
PC CLIENT :
- Install Firebird Win 32 bit version 2.5 and choose client pack during the installation
- Open Alo Photo Scan - Catalogue | Settings :
Database :
- Type : Multi User
- Path: enter the name of server pc or IP address before database path
E.g. "Server-pc:C:\Users\Public\Documents\ALO Solutions\Alo Photo Scan\CPS.DAT" or "192.167.1.1:C:\Users\Public\Documents\ALO Solutions\Alo Photo Scan\CPS.DAT"
General :
- Image path : enter the name of server pc before images path
E.g. "Server-pc:C:\Users\Public\Documents\ALO Solutions\Alo Photo Scan\Images" or "192.167.1.1:C:\Users\Public\Documents\ALO Solutions\Alo Photo Scan\Images"
For any trouble check if the firewall locks Firebird service.
After this operation we advise to insert a new article in server to see if you see in client (make it with software closed in client) then try to make the same thing on the contrary by client